Propagation mode of Xifu Begonia

Author:Jiang Hao Date:2022-04-06 12:05

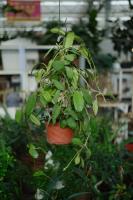
Xifu Begonia can be propagated by grafting. Select the seedling in good growth condition as the rootstock, cut a wound on its branch with a knife, insert the scion of Xifu begonia with tender buds into it, and fix it with a rope. After that, keep warm and wait for it to survive.

Preparation before grafting

The rootstock shall be seeded and propagated, and the grafting time shall be in spring and autumn

Branching process

Branches can be connected by cutting, splitting and leaning. This paper mainly introduces the split grafting method, which is the most primitive and commonly used grafting method

Step 1: rootstock

Cut or saw the selected rootstock at the grafting site. The standard of rootstock selection is a certain length from top to bottom, with smooth inner surface, no knots and straight texture. After the rootstock is ready, the next step is to use a cleaver to cut longitudinally along the center of the rootstock, and pay attention not to use too much or too little force. You can put the cleaver at the cleavage position you should watch in advance, then hold the cleaver firmly with your hand, gently tap the back of the cleaver, and embed the cleaver into the rootstock with the force of beating. However, when beating, the hand holding the cleaver had better not shake until the cleaver is 2 ~ 5cm deep

Step 2: scion

The scion should be cut into a length of 5 ~ 10cm, and it is best to have 2 ~ 3 buds. The most perfect way to cut the base into a wedge is to have two symmetrical cutting surfaces. Step 3: joint

Pry the cutting edge of the rootstock with a cleaver and insert the scion into the rootstock. Remember to move gently to avoid damaging the inside. The thick side of the scion should be outward and the thin side should be inward. Align the rootstock cambium with the scion cambium

flowers and plants

Tips for joint alignment

When the rootstock is thicker than the scion, the cortex of the rootstock is generally thicker than that of the scion. When combining, pay attention to make the outer surface of the scion slightly closer to the inside than the outer surface of the rootstock, so as to make the formation layers of the two coincide. In addition, the xylem can also be used as a standard to align the xylem surfaces of the two, and the cambium will naturally align. The diameter of the rootstock is much larger than that of the scion. Connect a scion on both sides of the rootstock and combine according to the previous method. After jointing, bind or wax the grafted rootstocks and scions. Be sure to wrap the cleavage and section tightly, and do not touch the scion during operation

Step 4: survival

About 10 days after grafting, if the buds retained above are still fresh and a corner of the petiole falls, it indicates that the grafting activity is successful and the binding can be removed in a few days. When the seedling grows to 80cm ~ 100cm, it has basically survived completely. After that, only dense branches, inward branches and overlapping branches are trimmed to keep a round crownflowers and plants

© Copyright Theflowerwiki.Com. All Rights Reserved. Sitemap DMCA Privacy Policy Novelhall Youbrief
Top

Propagation mode of Xifu Begonia

Jiang Hao
2022-04-06 12:05
Description Xifu Begonia can be propagated by grafting. Select the seedling in good growth condition as the rootstock, cut a wound on its branch with a knife, insert the scion of Xifu begonia with tender buds into it, and fix it with a rope. After that, keep warm and wait for it to survive.

Preparation before grafting

The rootstock shall be seeded and propagated, and the grafting time shall be in spring and autumn

Branching process

Branches can be connected by cutting, splitting and leaning. This paper mainly introduces the split grafting method, which is the most primitive and commonly used grafting method

Step 1: rootstock

Cut or saw the selected rootstock at the grafting site. The standard of rootstock selection is a certain length from top to bottom, with smooth inner surface, no knots and straight texture. After the rootstock is ready, the next step is to use a cleaver to cut longitudinally along the center of the rootstock, and pay attention not to use too much or too little force. You can put the cleaver at the cleavage position you should watch in advance, then hold the cleaver firmly with your hand, gently tap the back of the cleaver, and embed the cleaver into the rootstock with the force of beating. However, when beating, the hand holding the cleaver had better not shake until the cleaver is 2 ~ 5cm deep

Step 2: scion

The scion should be cut into a length of 5 ~ 10cm, and it is best to have 2 ~ 3 buds. The most perfect way to cut the base into a wedge is to have two symmetrical cutting surfaces. Step 3: joint

Pry the cutting edge of the rootstock with a cleaver and insert the scion into the rootstock. Remember to move gently to avoid damaging the inside. The thick side of the scion should be outward and the thin side should be inward. Align the rootstock cambium with the scion cambium

flowers and plants

Tips for joint alignment

When the rootstock is thicker than the scion, the cortex of the rootstock is generally thicker than that of the scion. When combining, pay attention to make the outer surface of the scion slightly closer to the inside than the outer surface of the rootstock, so as to make the formation layers of the two coincide. In addition, the xylem can also be used as a standard to align the xylem surfaces of the two, and the cambium will naturally align. The diameter of the rootstock is much larger than that of the scion. Connect a scion on both sides of the rootstock and combine according to the previous method. After jointing, bind or wax the grafted rootstocks and scions. Be sure to wrap the cleavage and section tightly, and do not touch the scion during operation

Step 4: survival

About 10 days after grafting, if the buds retained above are still fresh and a corner of the petiole falls, it indicates that the grafting activity is successful and the binding can be removed in a few days. When the seedling grows to 80cm ~ 100cm, it has basically survived completely. After that, only dense branches, inward branches and overlapping branches are trimmed to keep a round crownflowers and plants

More
Related articles