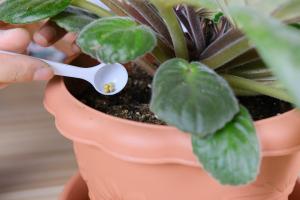
How to Plant Orchids in Small Pots
Orchids are a gorgeous addition to any indoor or outdoor space, and with the right care, they can thrive in small pots. Here are some steps to help you plant orchids in small pots:
Choose the Right Pot
Choosing the right pot is crucial for the growth and health of your orchid. If you are planting a small orchid, it's best to choose a pot that's only slightly larger than the root ball. For larger orchids, you can choose a pot that's one or two sizes bigger than the root ball.
The pot should have drainage holes to prevent the roots from standing in water, which can cause root rot. You can also choose a pot with a saucer to catch excess water, but make sure to empty it after watering to prevent standing water.
Prepare the Potting Mix
Orchids require a well-draining potting mix that's rich in organic matter. You can use a commercial orchid mix or make your own using a combination of ingredients such as bark, perlite, charcoal, and sphagnum moss.
Before planting your orchid, make sure to soak the potting mix in water for a few hours to help it absorb moisture. This will prevent the potting mix from drying out too quickly after planting.
Plant the Orchid
Remove the orchid from its original pot and gently tease out the roots to remove any old potting mix. Trim off any damaged or dead roots with clean, sharp scissors or clippers.
Place the orchid in the new pot and add enough potting mix to fill the space around the roots. Gently press the potting mix around the roots to ensure that they are in contact with the potting mix.
Make sure that the orchid sits at the same level in the new pot as it did in the original pot. If the orchid is planted too deep, the leaves may rot, and if the orchid is planted too high, the roots may dry out.
Care for Your Orchid
After planting your orchid, place it in a well-lit area away from direct sunlight. Water your orchid when the potting mix dries out, which may be once a week or every few weeks, depending on the humidity and temperature in your home.
When watering your orchid, make sure to water the potting mix thoroughly and allow any excess water to drain away. Avoid getting water on the leaves or flowers, which can cause them to rot.
Fertilize your orchid every few weeks with a balanced fertilizer during the growing season, which is usually from spring to fall. Follow the instructions on the fertilizer package and avoid over-fertilizing, which can damage the roots.
With these steps, you can successfully plant orchids in small pots and enjoy their beauty in your home or garden.

 how many times do yo...
 how many planted tre...
 how many pine trees ...
 how many pecan trees...
 how many plants comp...
 how many plants can ...
 how many plants and ...
 how many pepper plan...


