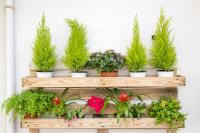
How to Pot a Plant in a Plastic Bag
If you are looking to repot a plant, you may not have to go out and buy a new pot. Using a plastic bag as a makeshift pot is a great way to reuse materials and save money. Here is a step-by-step guide on how to pot a plant in a plastic bag.
What You Will Need
Before starting the potting process, you will need a few supplies:
A plant in need of repotting
A plastic bag large enough to hold the plant's root system
Potting soil
Scissors
Water
Step 1: Prepare the Plastic Bag
Start by choosing a plastic bag that is large enough to hold your plant's root system. If the plastic bag has handles, cut them off with scissors. Then, use the scissors to poke a few small holes in the bottom of the bag. This will allow for drainage and prevent water from pooling at the bottom of the bag.
Step 2: Add Soil to the Bag
Next, add potting soil to the plastic bag. Fill the bag about halfway full with soil, or enough to accommodate the roots of your plant. Tamp down the soil gently to remove any large air pockets.
Step 3: Add the Plant
Carefully remove the plant from its current pot, and gently loosen its roots. Place the plant on top of the soil in the plastic bag, making sure that the roots are evenly spread out. Then, carefully add additional soil around the sides of the plant, being cautious not to damage the roots. Fill the soil up to about an inch below the rim of the plastic bag.
Step 4: Water the Plant
Water the plant thoroughly, using a watering can or hose. Be sure to water slowly, allowing the soil to absorb the water gently. Let the plant drain for a few minutes before placing it in a saucer or tray to catch any excess water.
Step 5: Place the Plant in a Bright Area
Find a bright spot in your home for your newly potted plant. Plastic bags are not as sturdy as traditional pots, so be sure to place the plant in an area where it will not be accidentally knocked over.
Step 6: Care for Your Plant
Be sure to water your plant regularly, and monitor its growth. Check the soil occasionally to ensure that it is moist but not waterlogged. If the plant outgrows the plastic bag, you can always transplant it into a larger pot or plant it in your garden.
Potting a plant in a plastic bag is an environmentally friendly and budget-conscious way to repot your plants. With a little bit of care, your plant will thrive in its new home!

 how many times do yo...
 how many planted tre...
 how many pine trees ...
 how many pecan trees...
 how many plants comp...
 how many plants can ...
 how many plants and ...
 how many pepper plan...


